Saturday, December 26, 2015

Walnut Stratocaster Or Number 8 - Wood Repair

While sanding the sides with the spindle sander, I discovered a surface imperfection. at first I thought it was a just a crack.
Here is a close-up detail shot.
I used a plastic pick to examine the depth of this hole.
For this repair I will be using glue, epoxy and walnut sawdust.
I tape off around the damaged area.
The holes are filled with glue and sawdust. I then let it dry over night.
The hole isn't completely filled.
I mix up a slurry of epoxy and walnut sawdust.
I tape off the damaged are once more. And this time, fill the hole with the epoxy slurry. For this one I chose a slow-curing epoxy. I'll let this sit for 24 hours.
The epoxy slurry leaves a raised scar, that I scrape off, and then sand with an 80 grit paper.
The end result is a nicely filled repair. It will still need to be filled.
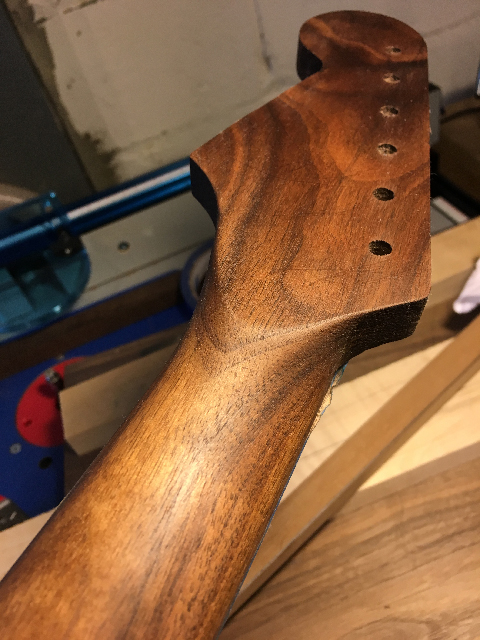
Here, I've wet the wood with mineral spirits to see how the repair may look after the final finish is applied.


I had a couple very small gaps between the fretboard and neck. I used the same glue and sawdust process for this repair.

Walnut Stratocaster Or Number 8 - Neck Pocket

Now it's time to move on to the neck pocket.

I start by clamping the neck to the body blank. I use a laser to line up the center-line of the body and the neck. clamp it in place. Then I attach two long pieces and one small piece of wood to the body blank. The wood is placed tightly against the sides of the neck. This creates a perfect routing jig.
I remove the neck. Then drill out excess wood using a 3/4 inch drill bit. I follow that by routing the pocket. Once complete I cut the body shape out, and use a spine sander to clean up the sides.
The neck now fits snuggly into the body.
I placed the pick-guard on these last two images, so that I could see just how it might look. I have not decided to use a pick-guard on this build.

Walnut Stratocaster Or Number 8 - Neck Carving

To carve neck I keep it simple. I use a coarse respite remove wood and shape the profile of the neck. I try to remove wood evenly from each side.
I follow that with a fine rasp to smooth rough scratches.
After that I use an 80 grit sand paper to remove bumps and scratches. Then I move on through finer grits 120 and then 220 grit. I want to get through most of the sanding before I move on to the next step - cutting the neck pocket.

Heat Activated Gluing

For the Center Strips of of Number 8, I tried a different method of gluing - heat activation. Frequently when gluing the small pieces of veneer its often difficult to clamp the wood properly.

Heat activation is great for gluing veneer. First, I spray one side of the veneer with water. Then I apply glue (in this case, Titebond II). The moisture from the water keeps the veneer from curling towards the glue side. I allow the glue to dry completely.
Once the glue is dry to the touch. I press the pieces of veneer together and use an iron to activate the glue. The wood bond is just as strong as if I clamped them together while still wet.

Friday, December 25, 2015

Walnut Stratocaster Or Number 8 - Body Blank

The body blank for this build is two pieces of walnut, with a nine-piece center strip.
The center strip is made up of alternating maple and walnut strips of various sizes.

Walnut Stratocaster Or Number 8 - Fretboard

For my latest project I decided to build a copy of a Stratocaster. I chose walnut and maple for this build. In some respects, this will be similar to the Junior project from last year.

As always I start with the fretboard and neck. The first step is to cut the fret slots. I'm using a bird's eye maple for the fretboard.
I decided to try my hand at a binding for the fretboard. I chose to create a three layer wood laminate. In this case walnut/maple/walnut. I used a process that I will describe in another blog post - heat-activated gluing.
After gluing the laminated pieces together, I cut the binding to a 45 degree angles so that I could fit the bottom piece and ensure continuity of wood.
To glue the binding to the fretboard I created a jig using two long boards and one small cut of wood.
I applied the glue to the binding, then pressed it against the fretboard with the extra wood clamped into place.
Here's the fretboard after gluing. This will be cleaned up after I sand the 9.5 inch radius of the fretboard.

New Digs

So, its been over a year since my last post. There have been a few changes. I've moved. I now have a new basement lutherie. Minus the laundromat (that's on the second floor). Here are a few photos from my new setup.

At first everything was just a minor mess. Then in during one of those common Mid-West spring storms, I discovered a major problem - water.

The water was literally pouring into the basement through several holes in the wall on the back side of the house.

The problem was caused by over-flowing gutters on the exterior of the house.
Instead of draining to the street, the downspouts backed up, overflowed and caused large pools of of water to develop and saturate the ground. That water then found holes in the basement walls and poured into my new lutherie.

After the drainage pipes were repaired (and I ran two de-humidifiers), I was able to move everything in.

Then I was ready to start working again.

This final photo is a detail of one of my work benches. I frequently use the tops for scribbling notes and equations. In this case I've used corner to measure the radius for frets and fretboards. Also, Let's Face the Music and Dance.