Friday, December 25, 2015

New Digs

So, its been over a year since my last post. There have been a few changes. I've moved. I now have a new basement lutherie. Minus the laundromat (that's on the second floor). Here are a few photos from my new setup.

At first everything was just a minor mess. Then in during one of those common Mid-West spring storms, I discovered a major problem - water.

The water was literally pouring into the basement through several holes in the wall on the back side of the house.

The problem was caused by over-flowing gutters on the exterior of the house.
Instead of draining to the street, the downspouts backed up, overflowed and caused large pools of of water to develop and saturate the ground. That water then found holes in the basement walls and poured into my new lutherie.

After the drainage pipes were repaired (and I ran two de-humidifiers), I was able to move everything in.

Then I was ready to start working again.

This final photo is a detail of one of my work benches. I frequently use the tops for scribbling notes and equations. In this case I've used corner to measure the radius for frets and fretboards. Also, Let's Face the Music and Dance.

Friday, October 17, 2014

1987 - Final Photos

So 1987 has now been completed. I began building this Steinberger copy over two years ago. I worked on it between projects. Once plugged in, the sustain is incredible. For such a small body this guitar really has a strong punch. I can not pinpoint the exact reason for the resonance of this build. The neck is a fat D-shape. The neck fits tightly into the body. And the pickup are Seymour Duncan Alnico II's - according to the SD website they are slightly weaker, allowing the strings to vibrate longer.
Here are my studio shots of the guitar:
Here's the Stats:
25 inch scale
2 piece Ash back
Curly Maple top with a Pau Ferro stripe
Thin Mahogany veneer separating the Ash back from the Maple top
Pau Ferro fretboard
3 Piece Set Maple Neck
24 fret neck
Zero fret
Thick D Profile Neck
Seymour Duncan Alnico Humbuckers
3-way On/On/On DPDT selector used as a mini pickup selector
I'm finishing up on a copy of a Steinberger P Series copy. The body is Ash with a Curly Maple top and the neck is a three-piece Maple with a Pau Ferro Fretboard. I decided against using active EMGs. Instead I'm going to go with a passive set of humbuckers. 


I'm a big fan of Seymour Duncan pickups, just looking for something that'll go well with the brighter sound of Ash and Maple.

Saturday, September 6, 2014

1987 - Finishing up

I'm down to the final steps on 1987.
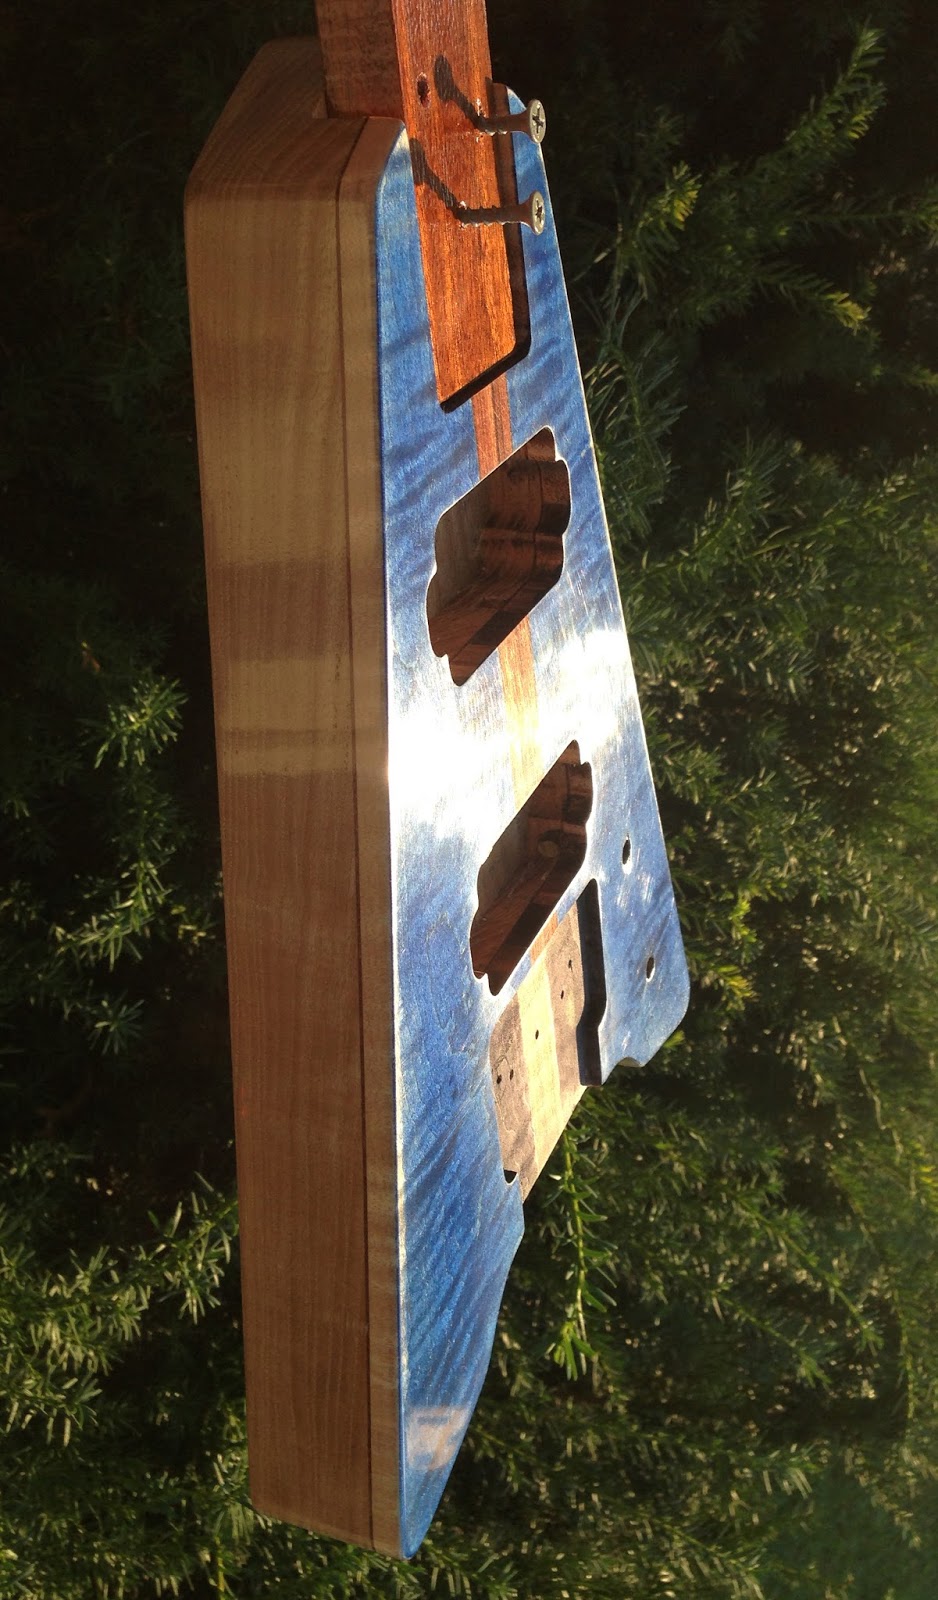
I've filled the grain. Stained the Curly Maple top black. Sanded most of the stain off. Re-stained the top blue. The remaining black stain helps the wood's figuring jump under the blue stain. I sprayed the body with shellac as a sealant coat and followed it with a coat of lacquer. 


Coming Soon - Les Paul Custom

This is where the build begins - a Les Paul Custom. Here's a few pictures of the raw wood.
Three pieces of Mahogany, with Maple veneer glued to the edges.


I glued a three pieces of veneer, Maple/Mahogany/Maple, for a triple pinstripe.


I am using a 16mm thick piece of Curly Maple for the Top.


The neck will be a three piece Mahogany and Maple combination and the fretboard will be rosewood.


This is going to be a fun and complex build.

Number 6 - In The Photo Studio

Now that it's completed, I brought Number 6 in to the Photo Studio on Friday.


Specs:
24.75 inch scale
3 piece Walnut back
Book-matched Curly Walnut
Thin Maple veneer separating the Walnut on the body
Katalox fretboard
3 Piece Set Walnut Neck
24 fret neck
Zero fret
Seymour Duncan JB and Jazz Humbuckers
3-way pickup selector 
2 Series / Parallel Switches

Number 6 - Fret Job

So in adition to having problems with the shellac finish, I also was not happy with the overall string height on Number 6. Unfortunately when I lowered the bridge, I discover that I had fret buzzes on the high E and B strings at the 7th and 8th frets. first I tried dealing with the buzz by going after the culprit - the 9th fret. I lowered, leveled, crowned and polished that fret. This cured the problem with the buzz at the 7th and 8th frets... but created a bus at the 9th fret, caused by the 10th fret... so i corrected that problem and... well, you can guess where this went. I was chasing a fret buzz.

I decided to take a different approach to fixing this problem. Armed with my copy of the Stew Mac 2nd Edition on Fret Work, digital calipers, a fret rocker, a fret dressing stick (sand paper), a fret crowning file, an iPad with Apple Numbers, and a finger-nail buffing block (found at the local drug store), I got to work on Number 6's fretboard.

I removed the strings and then used the digital calipers to take three measurements of each fret, on the high-E string side, one in the middle and one on the low-E string side.


I added all of this information into a spreadsheet on my iPad. I then created a chart showing the largest deviations between frets. This helped me come up with a plan of attach.
After pinpointing the problem frets on the chart, I taped off the fretboard and marked the tops of the frets with a red Sharpie marker. I then use the fret dressing tool to slowly sand the tops of the frets.

After sanding the frets, I check the fret height with the calipers. Then I use the fret rocker to check the height of the filed fret in relation to the fret immediately before and after the filed fret. If the rocker lays flat against all three frets, I mark the completed frets with a green Sharpie marker and move on to the next fret.
Once I've leveled all of the high frets, I use the fret crowning tool to round the top of the frets. I follow that by polishing the frets with the four-sided finger-nail buffing block. After completing all of the frets, I remove the tape, string Number 6 up again and test the frets.

Wednesday, July 16, 2014

Back to 1987 - My Steinberger copy

So now that I've almost completed the Junior. I've decided to turn my attention back to my Steinberger P-series copy, the guitar I am now calling 1987. First I drilled the holes for the neck ferrules using a 5/8" drill bit.


Then I attached the neck and the bridge and took 1987 for a test drive without any electronics. The guitar plays great. There is a fret buzz at the 6th fret of the G and D strings. But thats to be expected as I have not yet leveled the fretboard.


There's only one problem - the strings are sitting unusually high off of the guitar body. So I need to do a little more routing.

First I routed the neck pocket about 4 mm deeper. This put the fretboard about 1.5 mm above the body now.


Then I routed out the recessed bridge pocket an additional 2 mm. This will allow me to lower the height of the bridge saddles as well.


After I dealt with the string height, I moved on to routing the control cavity, and drilling holes for my volume and tone pots. I will still need to put in a pickup selector, I am just trying to find one small enough to fit comfortable between the volume and tone.


The guitar is now ready for final sanding and finishing. Here's my 1987 siting next to a Steinberger P-series body I purchased off of eBay a few years back.

Number 6 - the Jr has been completed... and then trouble

A couple weeks ago, I completed Number 6, the Jr. The guitar has two Seymour Duncan pickups, a JB and a Jazz. the pickups are both wired for series/parallel dpdt switches.


I rushed completion of the guitar so that I could bring it with us on a trip to visit family and friends. In the days following the completion I brought the guitar upstairs and hung it on the wall.


...and played it several times before starting our trip.
So the guitar traveled in a standard gig bag in the back of a car for about a 30 hour road trip over 10 days. While the heat was partially to blame, the reality was that I did not allow the shellac enough time to cure in a dry location. As a result the gig bag left some impressions on the finish.
...as did the wall hanger.

...dings also set in.
So, I now had to take a couple steps back. First, I turned on the dehumidifier in the basement and set it to 35%. Next, I sanded the marks up areas of the body with 400 grit wet (using mineral spirits not water) sand paper. Then I began french polishing again, just the affected areas. Now that this is done I will run through the sanding and final polishing steps in a couple of days. The shellac should be hard enough now to not mark up so easily.